Snickerdoodles!

Just a week or two before Christmas I visited an ENT specialist (ears, nose, throat) because of some on-going nasal and asthma issues. Amongst other things he is making me do, I have to be on a four week dairy-free diet. As well as no dairy, I'm not allowed chocolate flavours, like cocoa. :( Perfect timing for Christmas right? I cheated a tiny bit on Christmas and Boxing day. I couldn't not try one of my grandmother's custard meringue things, or the strawberry chocolate bon bons that my brother got for my stepdad! Am I right?! :P

So now that I'm on holiday with nothing to do, all I want to do is bake! This whole no dairy thing got me a little stumped at first since I couldn't use butter or milk in baking, until I discovered dairy-free margarine!


I bought myself another Christmas present, a bright red with white polka dot cookie tin, which lead to me wanting to bake cookies to fill the tin! I wanted to try something new, that involved as little dairy as possible and no cocoa. I'd seen pictures of snickerdoodles before and they intrigued me... so that's what I made!


Snickerdoodles (using dairy-free margarine) - Makes 42

250g butter
1 teaspoon vanilla extract
110g firmly packed brown sugar
220 caster sugar
2 eggs
410g plain flour
1 teaspoon baking soda
1/2 teaspoon ground nutmeg
1 tablespoon caster sugar (extra)
2 teaspoons ground cinnamon (extra)


Beat butter, extract and sugars until light and fluffy.
Add eggs, one at a time, beating until combined.
Stir in sifted flour, soda and nutmeg in two batches.
Cover and refrigerate for 30 minutes.
Preheat oven to 180 C and line baking tray with baking paper.
Combine the extra caster sugar and cinnamon in a small shallow bowl.
Roll level tablespoons of the dough into balls and roll in the cinnamon sugar.
Place balls about 7cm apart on tray.
Bake for 12 minutes.


They taste AMAZING.

I actually accidentally added 1 teaspoon of cinnamon into the dough mixture, which was fine by me since I love cinnamon! And I ended up making a second set of the cinnamon sugar because I used up the first lot half way through the batch.

The texture is fantastic - sort of crunchy on the outside and soft in the centre. I love them! Definitely a new favourite!

Merry Swiftmas!

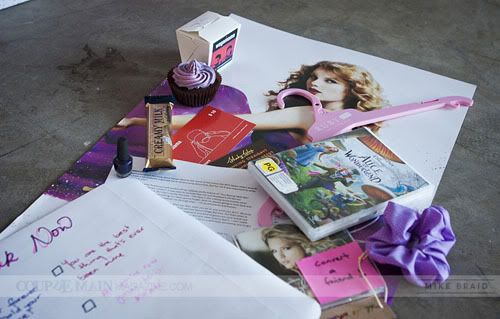
A few weeks ago my friend Shahlin from Coup De Main asked me to make a dessert table for a Taylor Swift Prom evening that was to be held for a competition winner. Basically people got to submit their ideas for the perfect Taylor Swift prom night with a budget of $3,000. The winner wanted their prom night to be themed Merry Swiftmas (due to Taylor Swift’s love of Christmas).

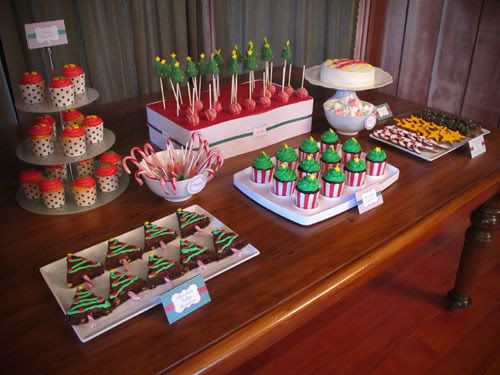
So I spent 3 days in the kitchen(s) baking my heart out and I was really pleased with how it all turned out! You can check out the photos from the actual Coup De Main event here. Hope you like it as much as I do!
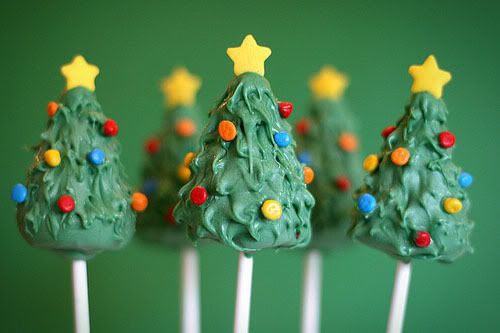
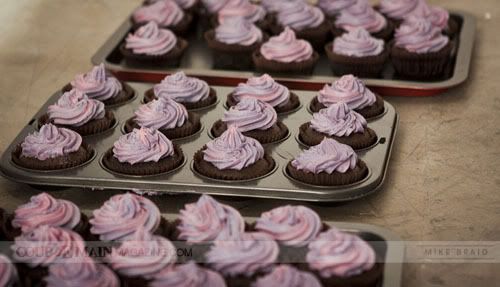
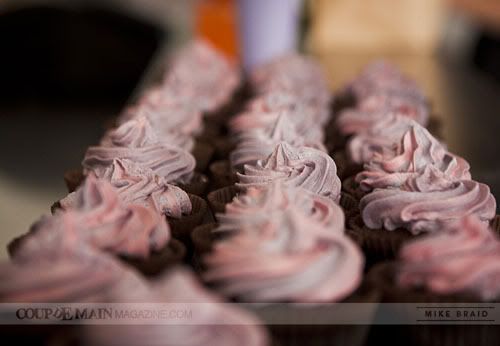
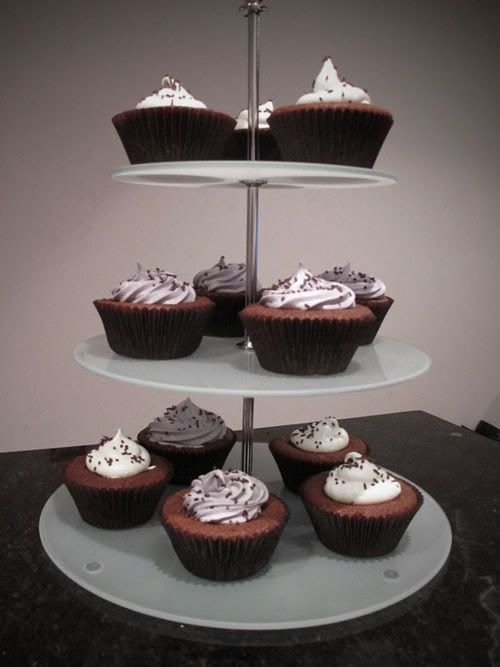
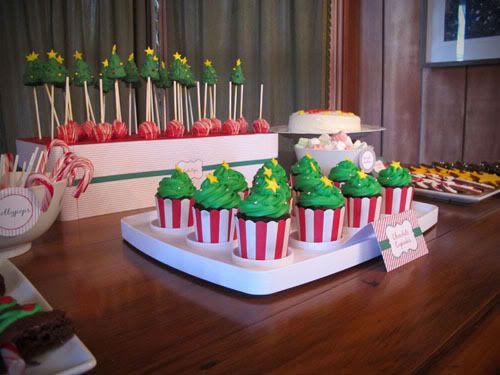
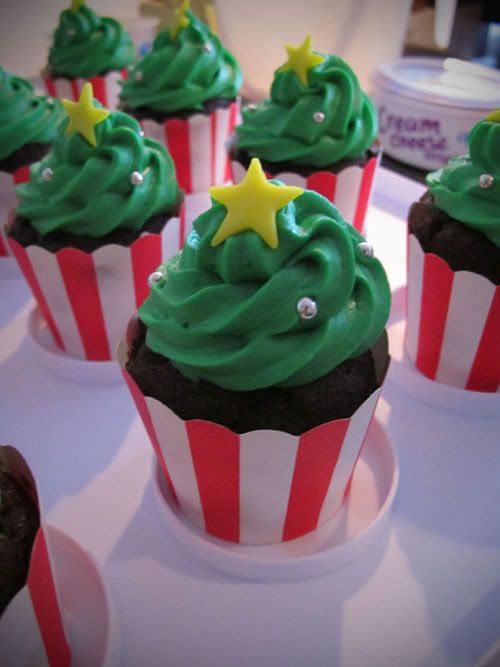


Chocolate Cupcakes

I had seen this photo online of these awesome little cupcakes that had icing that looked like a Christmas tree and though that something like that would be perfect for my dessert table.


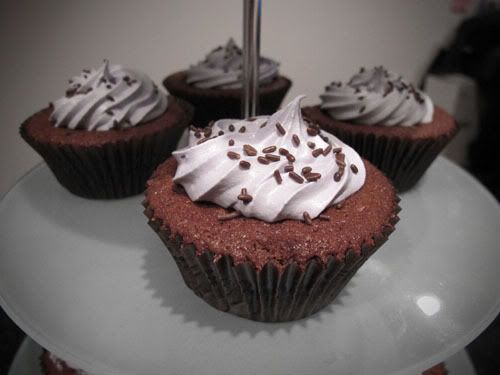
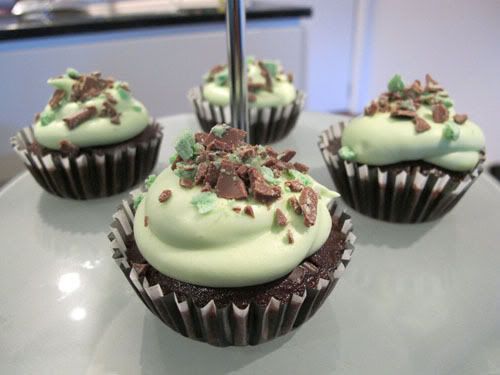
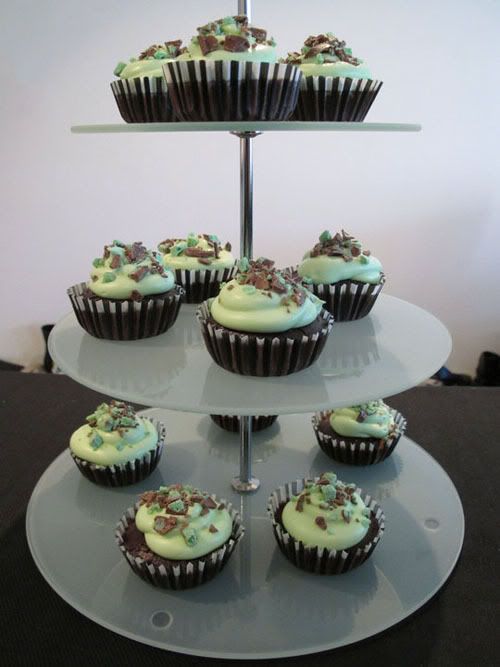
I used the usual chocolate cupcake recipe I always use (found here minus the peppermint essence and chocolate chips) and my usual plain cream cheese frosting recipe but added kelly green colouring gel to it.


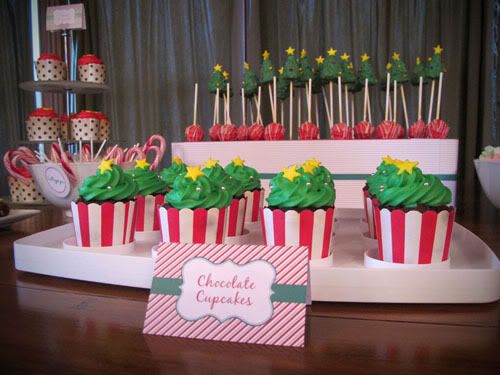
I piped them so they sort of had a Christmas tree look to them, added little silver balls and the yellow fondant stars I had made earlier in the week. Topped the stars off with some pearl luster dust and they were good to go!
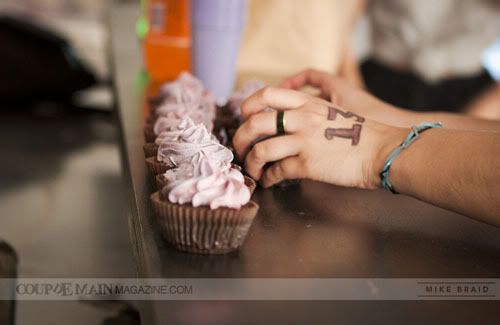
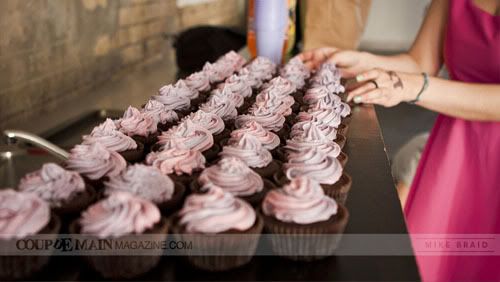
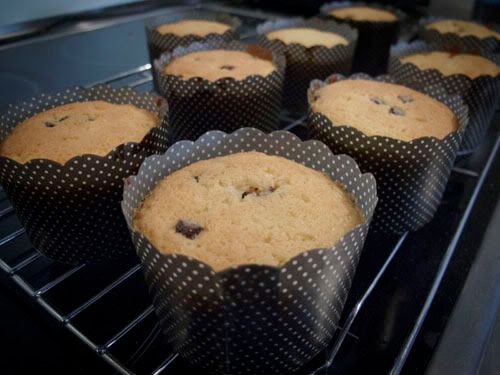
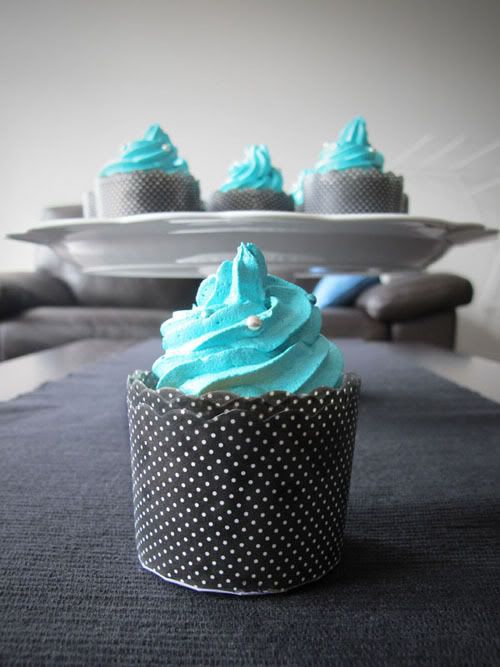


Lemon Cupcakes

One of the things that was requested by the girl who won the competition was that she wanted cupcakes with the number 13 on them, like the cupcakes Paul O'Grady gave Taylor Swift (see them here). I wasn't too keen on piping numbers so I decided to make fondant 13's instead.

I made these vanilla cupcakes (minus the chocolate chips) and added 1 teaspoon of grated lemon rind and a tiny bit of lemon juice to it. I then used my cream cheese frosting recipe (as linked to above) with some more lemon rind and red colouring gel. I piped them with a round tip so that they looked quite a bit different to the Christmas tree chocolate cupcakes and popped the fondant 13's on top of each one.


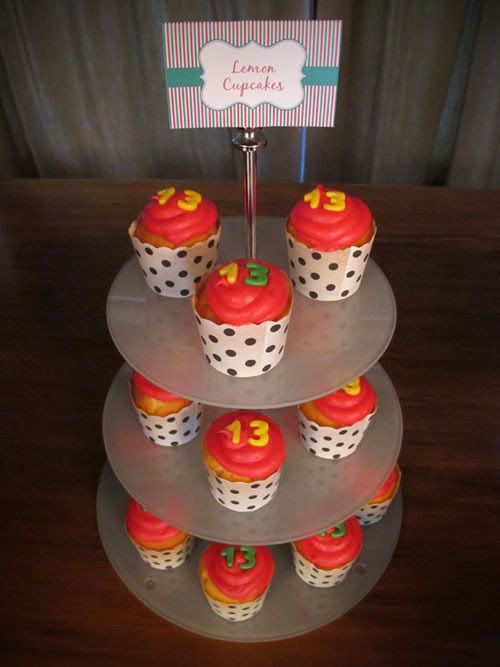
The humidity at the time made them blob out a little more than I cared for but what can ya do! I didn't want to keep adding icing sugar to it cause it would have just been wayyy too sweet. These were probably my least favourite thing on the table. I had a picture in my mind how they would end up and this wasn't quite it but that's okay! Live and learn...

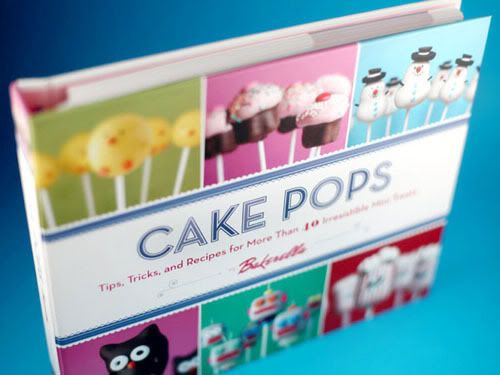
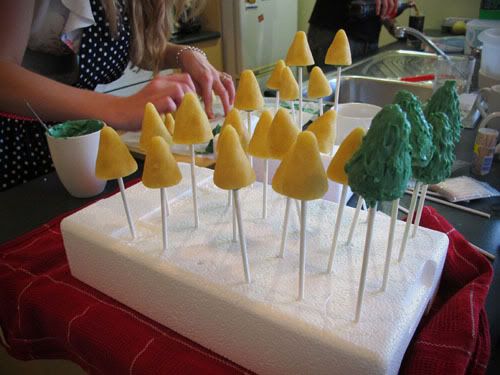
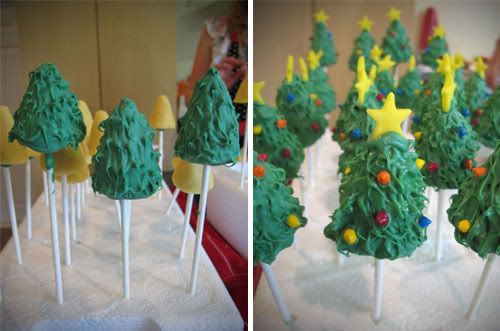
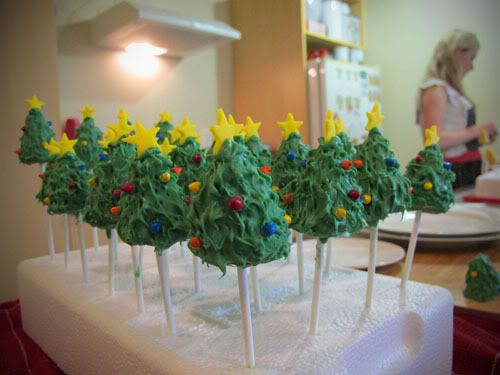
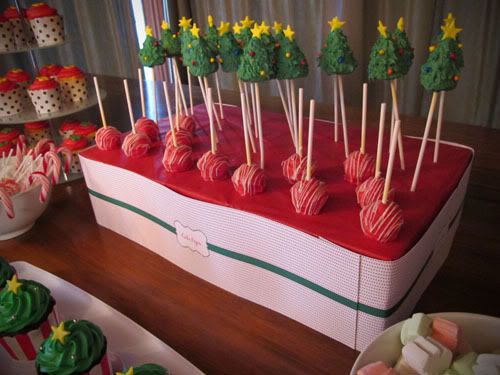
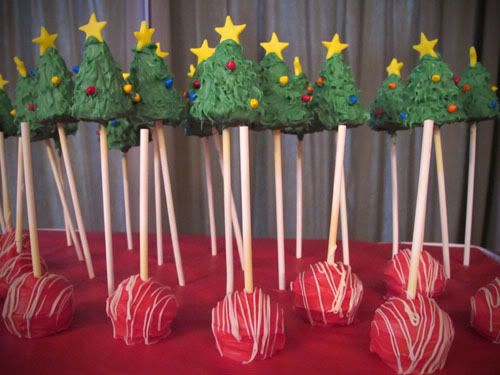
Cake Pops! (vanilla cake and vanilla frosting)

These cake pops were made by Lydia (Grace Cakes) and I, with the help of the fabulous Bakerella's Cake Pops book. They turned out wayyyy better than I thought they would considering it was the first time I'd ever tried to make them and I had no idea what I was doing!


They were a heap of fun but extremely time consuming! Check out a full blog post from me here about these cake pops with lots of details about how we made them.


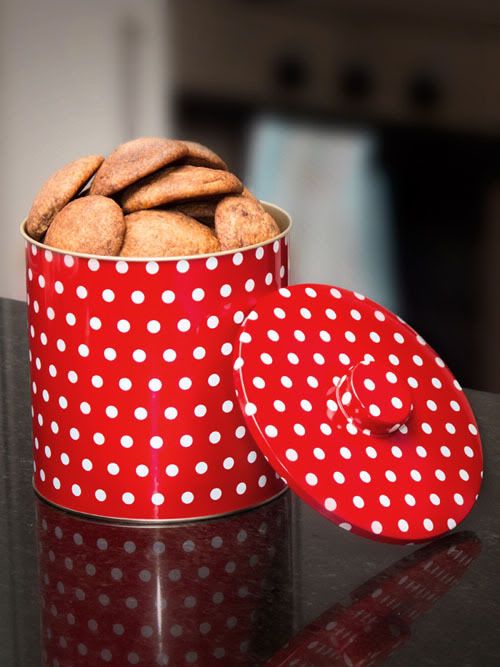
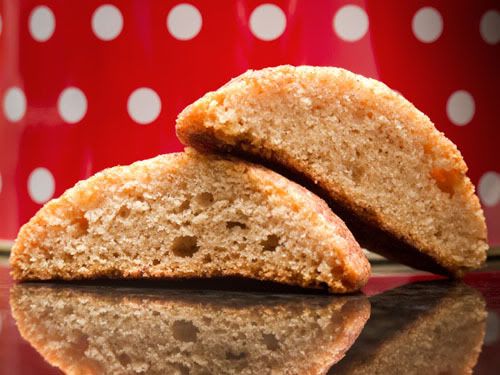
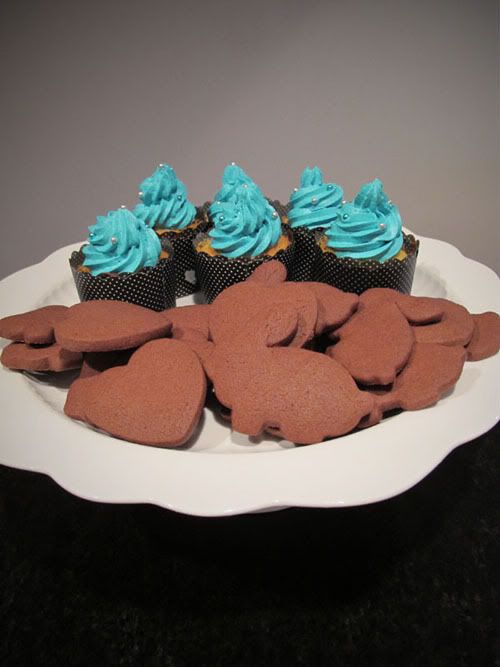
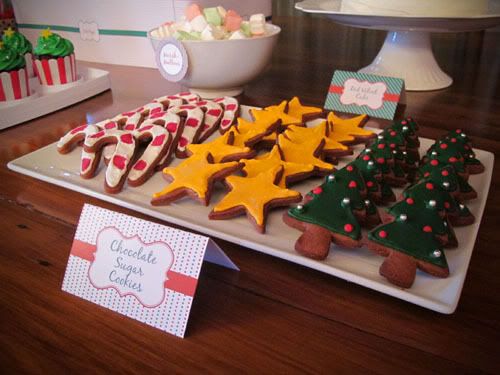
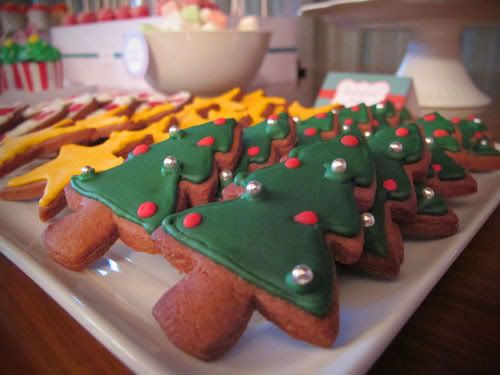
Chocolate Sugar Cookies

This was the first time I've ever made cookies by myself. Quite fun! I've posted a few photos of this recipe before but they were ones that Carly had made. So here's the recipe...

125g butter
165g firmly packed brown sugar
1 egg
225g plain flour
35g self raising flour
35g cocoa powder


Beat butter, sugar and egg until combined.
Stir in sifted dry ingredients in two batches.
knead dough on floured surface till smooth.
Roll between sheets of baking paper till 5mm thick.
Refrigerate for 30 minutes.
Preheat oven to 180 C and line baking tray with baking paper.
Cut out your shapes - I chose candy canes, Christmas trees and stars.
Bake for about 10-12 minutes.


I decided to have a crack at icing the cookies, and rather than making my own royal icing from scratch (having watched Carly make hers and it didn't turn out quite right) I decided to use Wilton's Color Flow as I had seen how well it turned out on the cookies done at Millys.

I found it surprisingly easy to work with (especially after Lydia had told me it was quite tricky to work with) and they came out better than I had imagined. I thought I would be quite terrible at outlining and I wasn't sure about how well the flooding would go. But it was all just fine! Not bad for my first attempt at cookies and flooding/outlining!


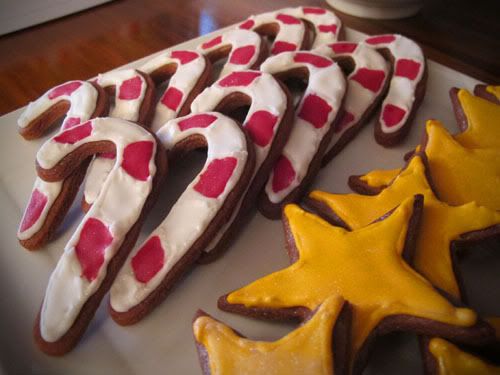
I also brushed on some of that pearl luster dust to make them a little more interesting! And added a few silver balls to the Christmas tree cookies.
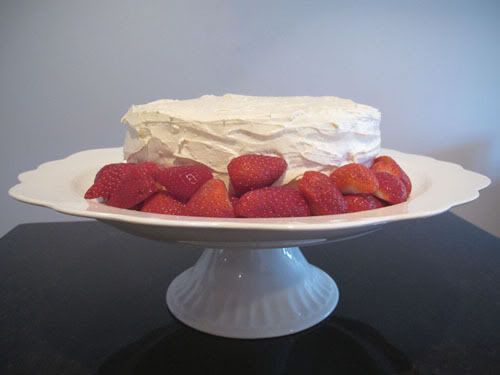
 Nom nom nom!

Red Velvet Cake

The girl that won the competition had specifically requested a cake that said "Taylor Swift is Fearless so Speak Now" (a sentence that contains all 3 of Taylor Swift's album names) however I really struggled with the whole writing with icing thing. So instead I made fondant letters (actually Lydia helped me out with the letters too cause my ones just weren't working out very well) and popped those on top of the cake.


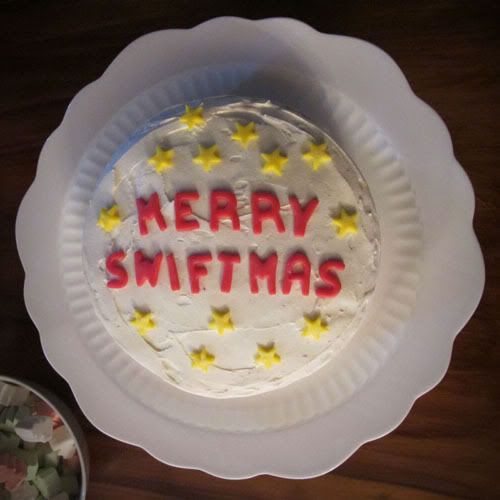
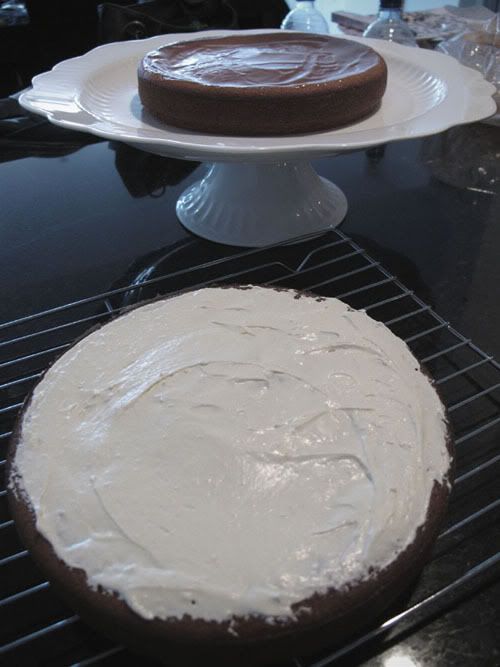
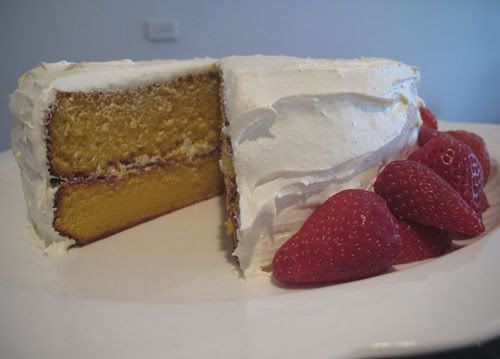
The cake itself was made with Lydia's red velvet cake recipe. As it wasn't a recipe straight out of a book or one of mine, I won't be giving it out here. But the frosting is just my plain cream cheese frosting (as seen in previous posts) with some whitener. The cake is actually made up of two cakes with a layer of frosting in the middle.

The stars were added by my boyfriend and I brushed luster dust on to all of the letters and stars. Pretty happy with the overall cake considering it was the second cake I've ever made.


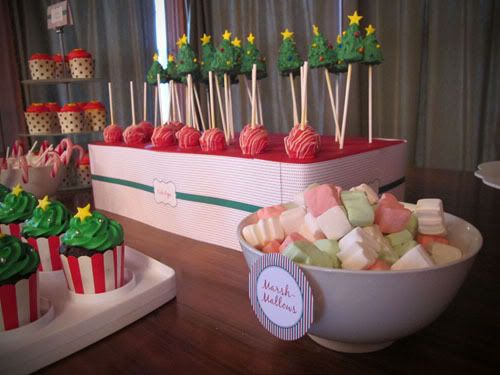
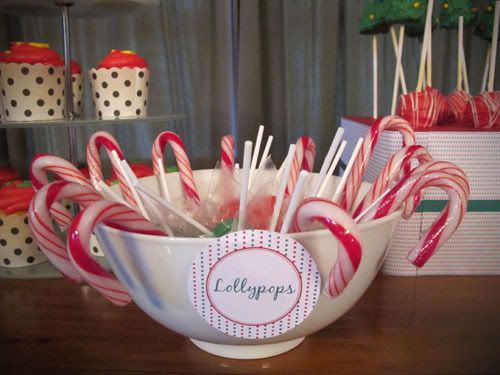
Christmas lollypops and candy canes

Arranged by my wonderful boyfriend who just wanted to hurry me up so we could get out of there haha.


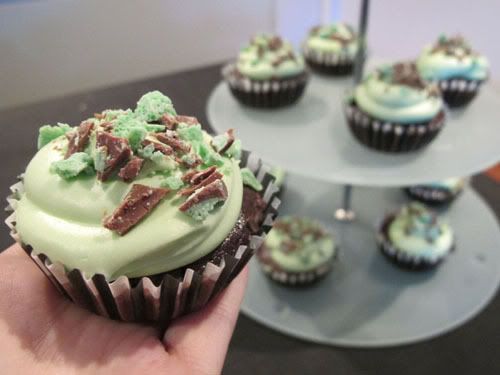
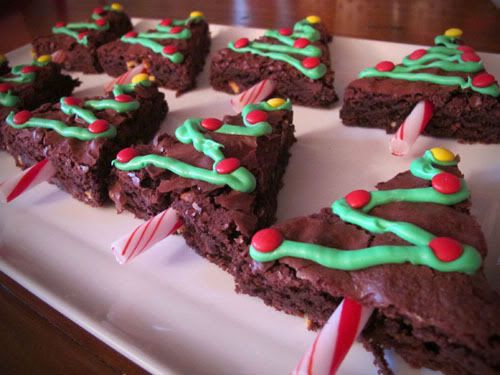
Triple Chocolate Fudge Brownies with a Peppermint Twist

These were sort of my add on item, to bulk up the amount of food on the table. Due to time constraints I decided to use packet brownie mix, I chose the wonderful Better Crocker pack, and added some things to make it a little more Christmas-ey (inspired by this picture here)!


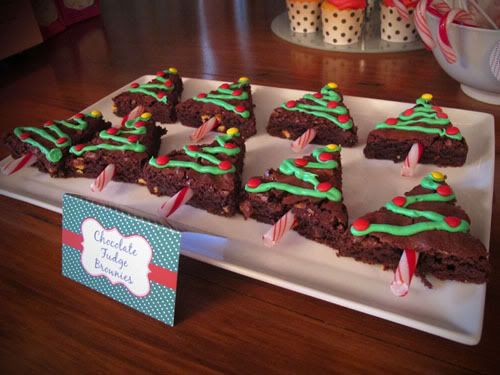
I had some Betty Crocker vanilla frosting left in the fridge so I added some peppermint essence to it and some kelly green colouring to it and piped it onto the triangle shaped brownies. I then added small bits of the straight part of candy canes to be the tree trunk. Added on a few mini M&Ms and voila! Brownie Christmas trees with a peppermint twist!


So that was my first attempt at a whole dessert table. Took me 3 stressful but fun days to do it all. I think if I ever get asked to do one of these again I will split the workload with someone else, or at the very least not include cake pops in it as those were far more time consuming than I thought they would be!

Super happy with how it all turned out!

I could be Bakerella. You don't know.

As a Christmas present to myself I purchased Bakerella's Cake Pops book.


My friend Lydia (Grace Cakes) purchased the book as well so we decided to have a cake pops date just before Christmas to attempt to make some fun Christmas cake pops! We decided to go with the Christmas Tree ones that Bakerella made.

We wanted to do Santa hats as well but Lydia had played with the red candy melts previously and they weren't a bright red, more of a dull red/pink so we ditched the Santa hat idea in fear that they wouldn't really look like Santa hats. Will look into ways to make it more red!

So pictured below are Bakerella's Christmas Tree Pops, which I think we got a very similar look to! It's a pity my photos are never going to be as nice as hers haha.


After we had already decided on a date for our cake pops date I was asked to do a whole dessert table for a Christmas event, and the event just happened to be the day after our cake pop date! It timed so perfectly and the Christmas theme worked in to what we were already doing. Perfect! My next post will go into further detail about that dessert table so you can check that out here.

Lydia and I's Christmas Tree Cake Pops and Plain Ball Cake Pops

Lydia made the vanilla cake and vanilla frosting from the recipes in Cake Pops book the day before (I was too busy with trying to do all of the other things for the dessert table to do this so Lydia was an amazingly huge help!).

We crumbled the cake and mixed it with the frosting which turned it into what looked like cookie dough. We then made our Christmas tree cone shapes and some plain ball shapes out of the mixture and popped them into the freezer to harden/cool.


We found that the longer we left the cake out of the fridge, the harder it was to dip them into the melted candy (Wilton Candy Melts available from Millys) without them falling off in the cup. So we left all of the cake balls/trees in the freezer and took them out one at a time to dip into the candy melts. It worked a treat once we figured that out!

Using a toothpick (new best friend!), we then created the tree branches from the melted candy. Some of them turned out better than others, there was a bit of a knack to it!


Then using a toothpick I blobbed on a little bit of candy melt and stuck on the chocolate sprinkles and fondant stars (that I had made earlier in the week). This part was pretty darn time consuming!

When they all at together they looked like a little forest of Christmas trees! I added on a bit of pearl luster dust to the stars just by brushing it on. They looked amazing!


While I did the time consuming sticking on sprinkle part, Lydia dipped the plain ball shaped pops into red candy melts and then did white candy melt drizzled over them. We decided to have them sitting upside down mainly out of ease. It was extremely hard to find a good piece of polystyrene to display the cake pops and it was really hard to actually get them to stand up nicely in it without toppling because the polystyrene wasn't a perfect block - it had parts cut out of it etc. Next time I make them I'll actually go to Spotlight and buy a proper block of it, or find some other fun crafty way to display them.

Pictured below is a sneak peak of the final result displayed on the dessert table. They looked really awesome and that bit of polystyrene was the perfect fit for all of the cake pops.


In the end, it was a very time consuming effort. Plain ball cake pops wouldn't take very long at all but making the branches and then sticking on all the sprinkles on the tree ones took a lot longer than I imagined. All up we spent about 8 hours making those!

It was worth the effort, everyone was amazed by them (Lydia and myself included). They tasted really intensely sweet! I definitely couldn't eat more than one though.

You will definitely see more of these cake pop experiments from me in the future! I can't wait to make more!

My first cake!

It might seem ridiculous to some people but I had never made a cake before, by myself, till a few weeks ago. I may have 'helped' my Mum make a cake or two when I was younger, but that was about the extent of it.

A lemon yoghurt cake had come up in conversation weeks prior to this and I could not get it out of my mind! It was all I craved for days! So that was what I made for my first cake.


Lemon Yoghurt Cake

125g softened butter
1 cup caster sugar
Finely grated zest of 2 lemons
3 eggs
1 cup plain flour
1 teaspoon baking powder
¾ cup plain yoghurt (I used unsweetened cause that's how I roll)

Preheat oven to 160 C fan bake.
Grease a 20cm spring-form cake tin.
Combine butter, sugar and lemon zest in a bowl and beat with an electric mixer until pale and creamy.
Beat in eggs, one at a time.
Sift dry ingredients together and add alternately with yoghurt, stirring to just combine and form a smooth batter.
Spoon mixture into prepared tin and bake for 45 to 50 minutes.


A layer of lemon curd was added on top of the first cake. I then made up some Cream Cheese Frosting (whitened) and added a layer of that on top of the lemon curd. Popped the second cake on top of that and then used the remaining cream cheese frosting to cover the entire cake.


The strawberries were the perfect addition as they balanced out the sweetness of the cake. Definitely a keeper recipe! Will be making many more of these.


NOW THAT'S MY KIND OF CAKE.

P.S. Check out Carly and I's cute new yellow aprons in that last picture. A full apron for the main baker and the little waist one for the assistant! :P

Happy Belated Halloween!

I'm super late in posting this. Nearly 2 months late! Oops!

I wanted to do some fun Halloween themed cupcakes, nothing too fancy but I had the look in mind that I wanted. I made Vanilla Cupcakes and coloured them bright orange. I used this recipe minus the chocolate chips.


I used my Cream Cheese Frosting and whitened it a bit, to get rid of the yellow tinge the butter and cream cheese give it. I piped them and then sprinkled some orange candy-coated chocolate drops on top.


They turned out exactly how I wanted them! And the black and white striped cupcake papers were perfect! The little orange chocolate drops looked like little horns coming out of the frosting. Hehehe.


While I did the cupcakes, Carly made some chocolate sugar cookies in the shape of bats, pumpkins and ghosts. She used royal icing on them, which really needed to be made thinner so that we could do outlines and flood them. Now I know not to do that again!

I'll be making some of my own chocolate sugar cookies (actually I'm making them whilst writing this for my Christmas dessert table project!) so I will post the recipe for those soon.


Carly also did some chocolate covered strawberries with little scary faces on them, using the white royal icing. So cute!


So that's our awesome Halloween mini dessert table! Hope you like it!

Taylor Swift's 'Speak Now' Album Listening Party Cupcakes

Back in October my friends Shahlin and Sacha from Coup De Main asked me to make some cupcakes for their Taylor Swift advance 'Speak Now' album listening party! We had to make 48 cupcakes with frosting to match the album cover. I'd never made that amount of cupcakes before and luckily Carly helped out.


Shahlin requested chocolate / caramel flavoured cupcakes with buttercream frosting. We decided to test a few different ways of getting the caramel flavour in there with using our usual Chocolate Vegan Cupcake recipe (found here minus the peppermint essence and chocolate chips). We tried three different ways to put the caramel flavour in: a rolo in them, a piece of caramello chocolate in them or a drizzle of toffee syrup injected in them. Rolo won.


Carly and I took turns doing a dozen batch of cupcakes each at a time. That worked really well. Got to play quite a few games of Speed while we waited for each batch to bake.


Then came the buttercream frosting. The colour definitely didn't turn out how I wanted it. The frosting itself was fine but I wanted the colour to be a super vibrant pink and purple to match the colours of the dress Taylor Swift wears on the album cover. However, due to disagreements, we didn't put enough colouring in to get them to be that vibrant.


They still turned out pretty good in the end and we got some great feedback about them. Would have liked to put on some luster dust on top to make them shimmer like the album cover too but we ran out of time.


Interesting experience to say the least! So those were our Taylor Swift 'Speak Now' Chocolate and Caramel Surprise Cupakes!

Blue teeaaaaaal.

Teal is one of my favourite colours right now and I really want to try out the teal colouring gel I just got. I also really wanted to test out these black and white dotty cups I bought. Decided to go with something simple but not overly plain, so I made Vanilla Chocolate Chip Cupcakes.


Vanilla Chocolate Chip Cupcakes
(actually just vanilla butter cakes with added chocolate chips)

1 cup self raising flour
90g softened butter
1 teaspoon vanilla extract
1/2 cup caster sugar
2 eggs
2 tablespoons milk
A handful or two of chocolate chips


Preheat oven to 180 C.
Sift flour into bowl, add butter, vanilla extract, sugar, eggs and milk.
Beat together until ingredients are combined and the mixture changes to a paler colour.
Bake for 20 minutes.

The paper cups I used didn't really work as nicely as I had hoped. The ended up completely covered in grease from the mixture. I put them into a second cup to hide it but those just looked even worse. Bit of a bugger. I think if I really wanted to use them again I would bake them in plain cups and then pop them into the black and white dotty ones.


Vanilla Butter Cream Frosting

125g softened butter
240g icing sugar
2 tablespoons milk

Beat together. I then added in a little bit of whitener so that they yellow from the butter wouldn't effect the teal, and then popped in some teal colouring gel. They came out a lot bluer than I would have liked but the colour is still stunning!


Carly made some adorable chocolate sugar cookies in the shape of bunnies and hearts to go with the cupcakes. They tasted delicious! I'll eventually make some of these too and I'll post the recipe then.

TIP: All cupcakes should really be eaten as a cupcake sandwich, as shown in one of the pictures above. Makes them so much easier to eat when they have so much frosting! Just break the cake part in two and take the bottom half and plonk it over the frosting and squish down. Nom nom nom!

Golden.

I recently got the recipe for the chocolate cake my mum makes which I had grown up with and decided to test it out in cupcake form. So these were my Chocolate and Golden Syrup Cupcakes... (I added golden syrup into the title of these because although the cake itself is just a normal chocolate cake, the golden syrup in it really stands out to me - enough to make it a prominent flavour).


Chocolate and Golden Syrup Cupcakes

1 cup sugar
113g butter
2 tablespoons golden syrup
1 egg
2 tablespoons cocoa
1/5 cup boiling water
2 cups self raising flour
1 teaspoon baking soda
3/4 cup milk


Preheat oven to 180 C.
Beat butter and sugar together till creamy. Add egg and golden syrup.
Dissolve cocoa in boiling water and add to mixture.
Add sifted flour.
Add baking soda dissolved in milk.
Bake until done (maybe 20-25 mins)


And of course I used my usual Cream Cheese Frosting recipe (60g softened butter, 160g cream cheese and 3 cups icing sugar) which I split in two. One batch I added whitener to and the other I added some purple colouring gel. Once piped onto the cupcakes I added some chocolate sprinkles on top. Voila!

Minty fresh.

Carly and I had wanted to make Mint Chocolate Chip Cupcakes for a very long time. My boyfriend isn't a fan of mint chocolate flavour so it had been put off for ages. We adapted a few recipes that we already had to create our own little masterpieces and boy were they delish!


Mint Chocolate Chip Cupcakes
This recipe is essentially just a vegan chocolate cake recipe, with added chocolate chips, peppermint essence and put into cupcake cases!

1 and 1/2 cups plain flour
3 tablespoons cocoa
1 teaspoon baking soda
1 cup sugar
1/2 teaspoon salt
5 tablespoons cooking oil
1 tablespoon vinegar
1 teaspoon vanilla
1 cup cold water
1 teaspoon peppermint essence
1/2 cup chocolate chips


Preheat oven (not actually sure of heat, maybe around 160-180 C).
Mix all the dry ingredients.
Add 3/4 of the chocolate chips and mix.
Add all wet ingredients.
Divide mixture into 12 standard cupcake cases.
Sprinkle each one with the left over chocolate chips.
Bake until they look done? Haha. Not sure of the actual length of time. We just wing it.


We used our Cream Cheese Frosting recipe for the icing and added 1-2 teaspoons of peppermint essence and some green food colouring. Topped it off with some chopped up Cadbury Mint Bubbly. Yum!

These are Carly's favourites so far and are definitely right up there for me. I think I still want to perfect the recipe though, I wasn't completely sold on the vegan chocolate cake adaptation but they were still amazing and looked super cute!